

Setting up webhooks
This page shows you how to manage the webhooks lifecycle:
- Building a webhook handler
- Subscribing to webhooks
- Securing your webhooks
- Testing your endpoint
- Disabling or deleting an endpoint
Building a webhook handler
The first step is to build your own custom endpoint. For each event occurrence, Perk sends a POST request to your endpoint with a payload in JSON format. The webhook endpoint you create should at least:
- expect data through a POST request
- confirm successful receipt of that data
To acknowledge receipt of an event, your endpoint should return a 2xx HTTP response status code back to Perk. All response codes outside this range, including 3xx codes, will be interpreted as the webhook data not being properly received.
A URL redirection or a "Not Modified" response is treated as a failure. Perk will ignore any other information returned in the request headers or request body.
NoteIf Perk does not receive a
2xxHTTP status code, the notification attempt is repeated several times using exponential backoff to allow recovering from server malfunctions. After multiple failures to send the notification, Perk will mark the event as failed and no longer attempt to send the notification.
Subscribing to webhooks
There are two different ways you can subscribe to webhooks:
- Directly from the platform, in Settings > Developer > API tools
- Using the Perk API
You can create multiple webhooks subscribing to the same events, however the target URL for each of the webhooks must be unique. Partners find creating multiple webhooks subscribed to the same event (such as trip.created/updated) a useful mechanism to allow them to map one Perk account to multiple accounts/entities in their platforms.
Subscribe using the Perk platform
To add a webhook, go to Settings, Click Developer tools > API tools, and then on the Webhooks tab to list existing webhooks.
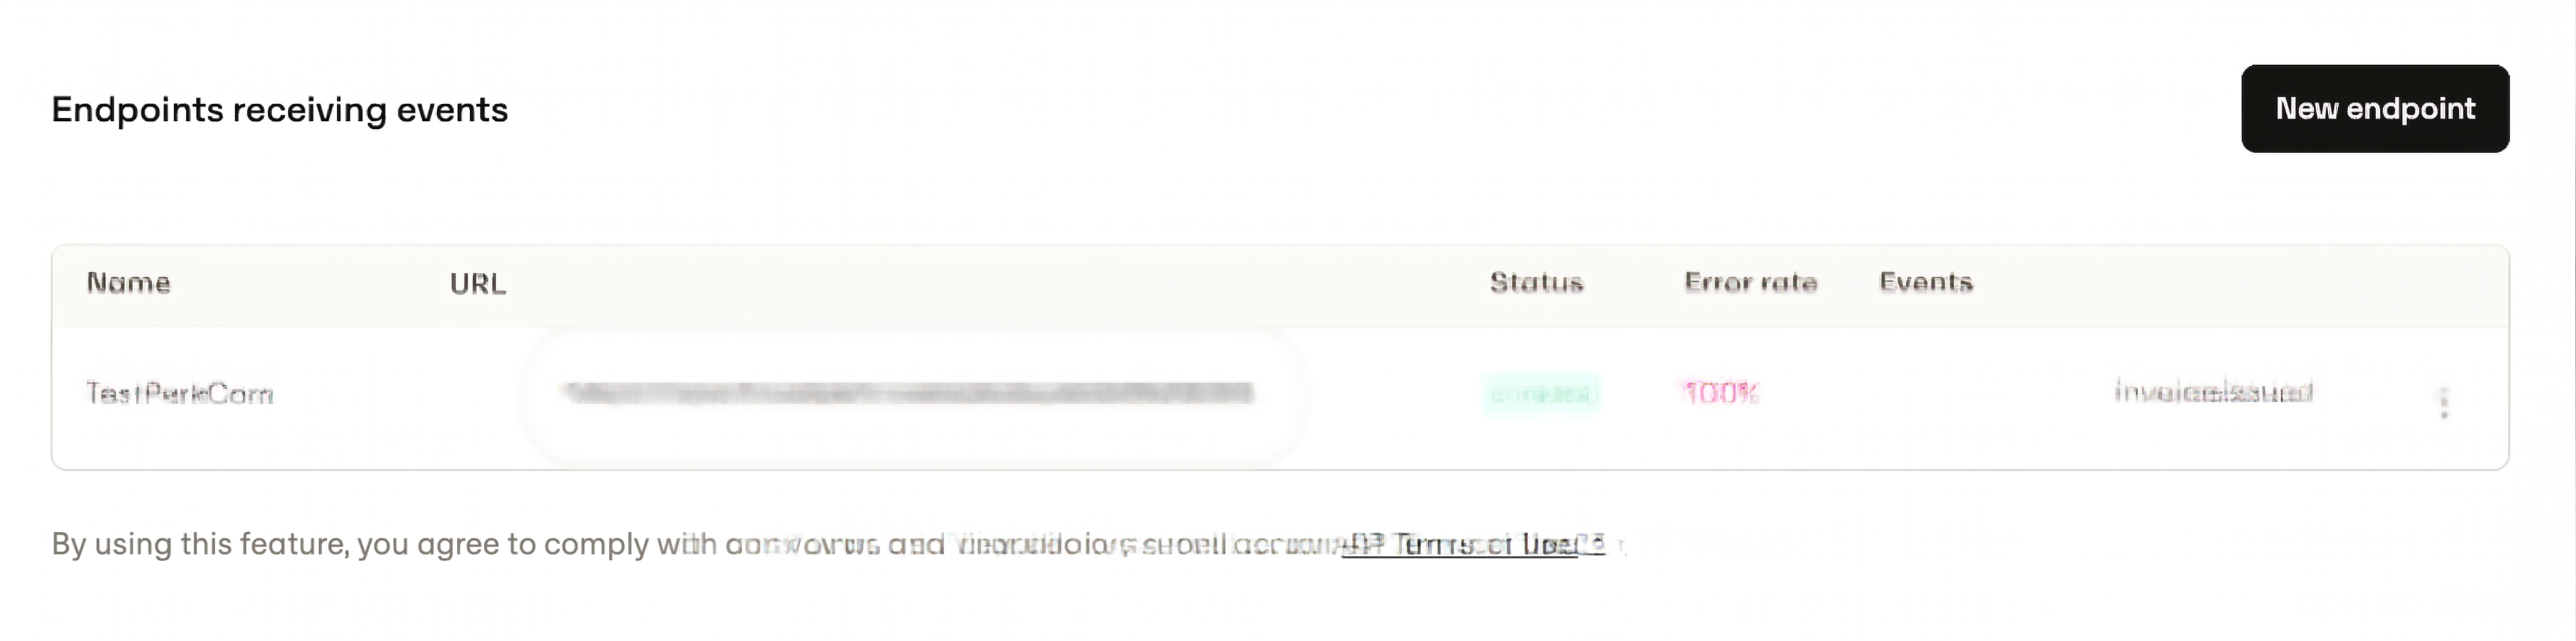
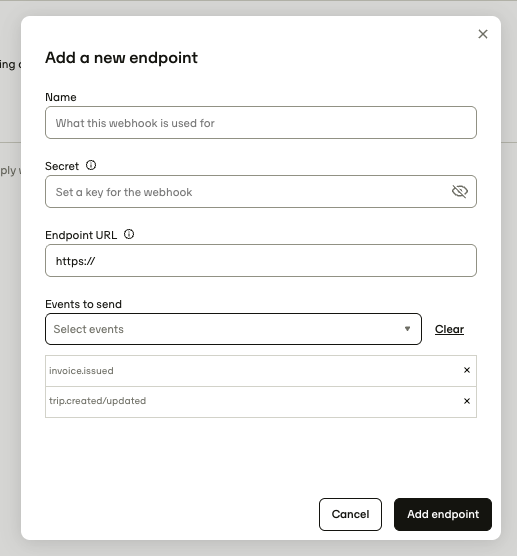
To add a new endpoint, press Add endpoint and enter the following information:
- Title: a meaningful title that clearly describes the webhook subscription
- Secret: the secret that Perk will use to sign all payloads
- Endpoint URL: the HTTPS URL where event notifications will be sent
- Events to send: a list of events this URL will handle
Subscribe using the Perk API
You can also configure webhooks programmatically through the Perk API. See the API reference for more details on how to subscribe to webhooks. If you are a Perk partner, you can use an OAuth application integration to manage webhooks on behalf of your integrated customers that grant you the necessary access.
Securing your webhooks
Listening to a webhook exposes an endpoint to the web. Perk helps you secure your endpoints through signatures. When creating a new endpoint, Perk asks you to enter a secret which is then used to sign all webhook payloads, allowing you to verify the authenticity of the source of the webhook.
Before processing data in your handler, you should always verify the signature to authenticate Perk as the sender of the request. The signature is provided in the Tk-webhook-hmac-sha256 header of the request.
Verification is completed by computing the HMAC using the secret and comparing it to the Tk-webhook-hmac-sha256 header value. Perk uses HMAC-SHA256 for this purpose.
It's important that you keep the secret safe and change it periodically by editing the endpoint from the app or through the REST API.
As an example, the following Python snippet can be used to verify the signature:
import hmac
import hashlib

def verify_signature(request):
    payload = request.data
    secret = settings.TKWEBHOOKS_SECRET
    signature = hmac.new(secret.encode(), json.dumps(payload).encode(), hashlib.sha256).hexdigest()

    if signature != request.META['Tk-webhook-hmac-sha256']:
        return HttpResponse(status=400)
Webhook delivery origin IP address
To verify the authenticity of Perk webhooks, use the signature header. This lets you securely authenticate the source of the webhook as being from Perk. Perk doesn't publish the origin IP addresses used by the platform, as the webhook signature provides a significantly stronger and more robust mechanism for validating authenticity.
Testing your endpoint
Waiting until an event occurs to test your webhook endpoint can be painful. There are two ways to test your webhook integrations: you can either use the sandbox environment to create webhooks and then perform the actions required to trigger the given webhook in the sandbox, or you can use the test webhook endpoint to receive a stub. After creating the endpoint, press Test. This fires the following sample JSON to the URL specified:
{
    "test": "true"
}
The headers sent with webhook deliveries are specified here.
As your webhook endpoint is used asynchronously, its failures may not be obvious to you until it's too late (e.g. after it's been disabled). Always test that your endpoint works.
Disabling or deleting an endpoint
Just like the webhook subscription, you have two different ways of disabling or deleting webhooks:
- Directly from the platform (Settings > Developer tools > API tools)
- Using the Perk API
If you disable an OAuth application that you allowed to create webhooks on your behalf, their webhooks will be deleted.
Disable or delete using the Perk platform
To disable or delete a webhook endpoint, go to Account settings, click on the Developers section, and then on the Webhooks tab to list existing webhooks. Pick the endpoint you want to disable, click on the right side and disable or delete accordingly.
Disable or delete using the Perk API
You can also configure webhooks programmatically through the Perk API. See the API reference for more details on how to delete or disable webhooks.
Updated 3 months ago