

Getting started with Okta SCIM provisioning
Connect Okta to Perk with SCIM to automatically create, update, and deactivate users. Step-by-step setup for admins, including SSO and troubleshooting.
By the end of this guide, you will have connected Okta to Perk using System for Cross-domain Identity Management (SCIM) and provisioned your first users automatically.
SCIM provisioning lets Okta create and manage Perk user accounts for you, so you don't have to add or update people by hand. Once set up, Okta can:
- Create users in Perk.
- Update user attributes.
- Allow or remove sign-in access to Perk.
The table below lists the user attributes Perk supports by default. To map more fields, see Set up custom attributes in Okta.
| Supported user attribute | Notes |
|---|---|
| Given name | |
| Family name | |
| Honorific prefix | |
| Username | Must be a lowercase email. For example, [email protected] works, but [email protected] doesn't. |
NoteFor more on each attribute, including the Enterprise, Travel, and Expense schema extensions, see the SCIM user model reference.
Prerequisites
Before you start, make sure you have:
- An active Perk account
- A Premium or Pro plan
- Admin access to your Perk account, so you can open Settings > Integrations
- An Okta administrator account
To check that you're an admin in Okta, select your name in the top-right corner, select My Settings, and look for Admin next to your name.
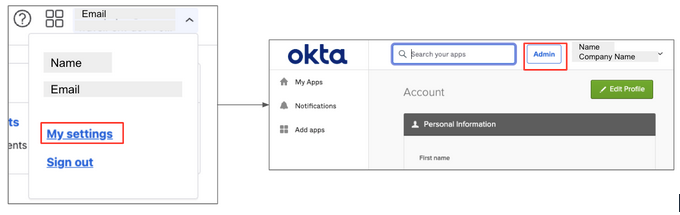
NoteIf you already have a single sign-on (SSO) integration between Okta and Perk, your next step depends on which app you use. If you use a custom app, we recommend removing it and following this guide to set up SSO and provisioning together. If you use the official app from the catalog, go straight to Set up user provisioning.
If you aren't sure, open the existing app and check whether the User provisioning tab is available.
Add the Perk app to Okta
First, add the Perk application to your Okta account.
- Sign in to Okta as an administrator.
- Go to Applications > Applications > Browse app catalog.
- Search for TravelPerk and select it.
- Select Add integration.
- Fill in the general settings (see the recommendations below), then select Next.
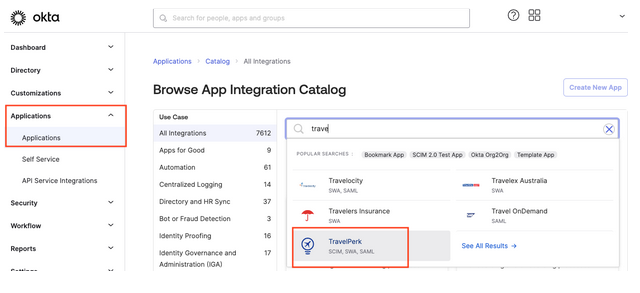
NoteWhile the Okta app for Perk is still named TravelPerk, you use this app for user provisioning in Perk.
Use these recommendations for the general settings:
- Application label: the name shown under the app on your home page.
- Application visibility: unselect both boxes so the app is visible to users and in the Okta Mobile App. The app only appears for users you assign it to, so you stay in control of who sees it.
- Browser plugin auto-submit: select this box.
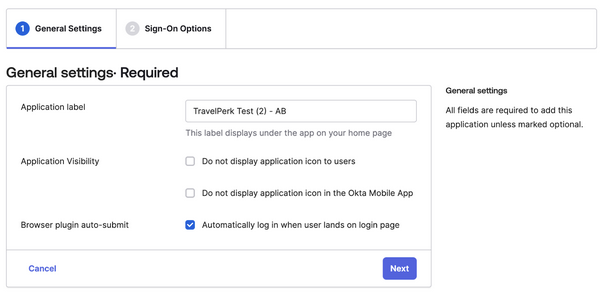
General settings
Set up single sign-on
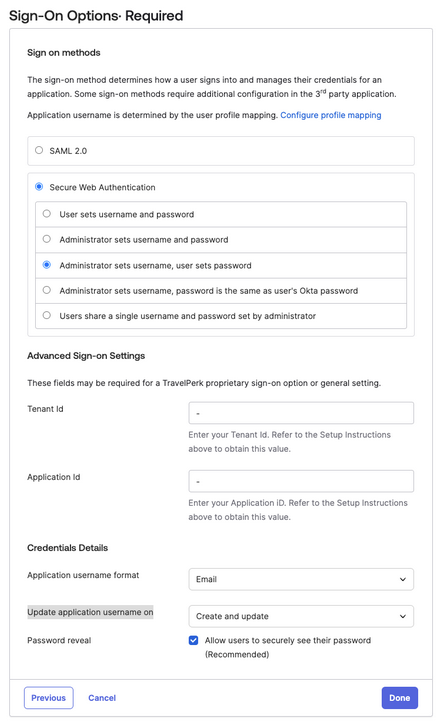
Next, Okta directs you to the Sign-On Options tab. Choose one of two sign-on methods: SAML 2.0 or secure web authentication.
Option 1 — SAML 2.0 turns on single sign-on (SSO)
Your users can sign in to Perk in one click with their Okta credentials. Select View Setup Instructions and follow the steps, then continue to Set up user provisioning.
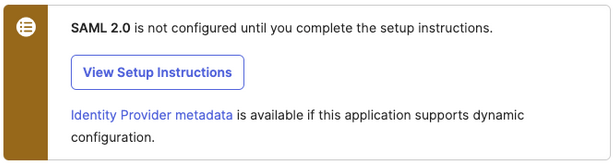
Option 2 — Secure web authentication
Your users sign in to Perk with their Okta username and a password of their choice.
To set it up:
- Set the sign-on option to Administrator sets username, user sets password.
- Set the Tenant ID and Application ID. If you only need SCIM, use a placeholder value such as
-for both. If you want SSO and SCIM in the same app, get your Tenant ID and Application ID (see Find your Tenant ID and Application ID), then follow the SAML 2.0 steps above. - Set Application username format to Email.
- Set Update application username on to Create and Update.
- Under Password reveal, check Allow users to securely see their password.
- Select Done.
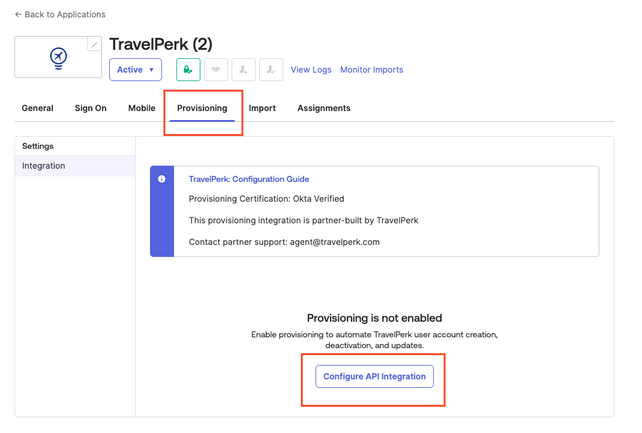
Once the app is set up, turn on API provisioning:
-
Select the Provisioning tab, then select Configure API integration.
-
Select Enable API integration, then select Authenticate with Perk.
-
Sign in to Perk as an account admin or developer user.
-
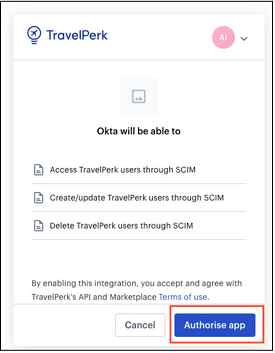
When prompted, select Authorize app to grant access to your Perk account.
-
Back in Okta, confirm you see the banner Perk was verified successfully!, then select Save.
-
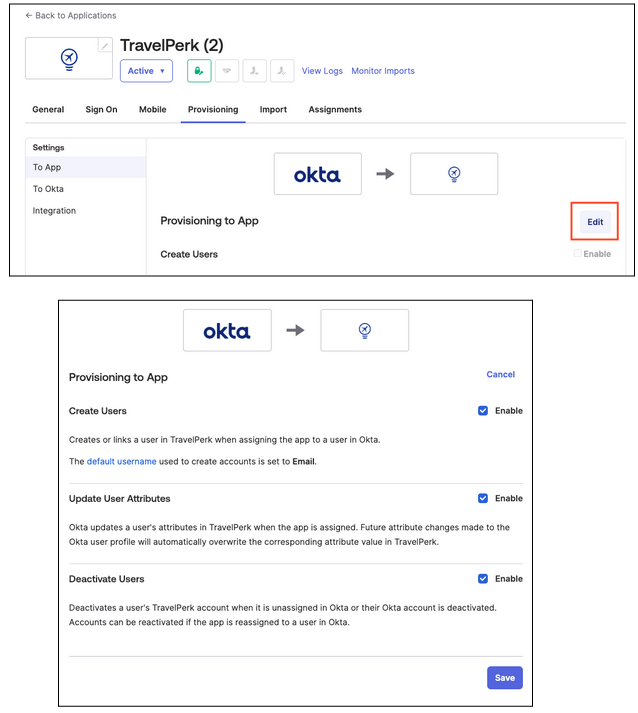
Under Settings, select To App, select Edit, and enable Create Users, Update User Attributes, and Deactivate Users. Then select Save.
Assign users to the app
Now choose who to sync to Perk:
-
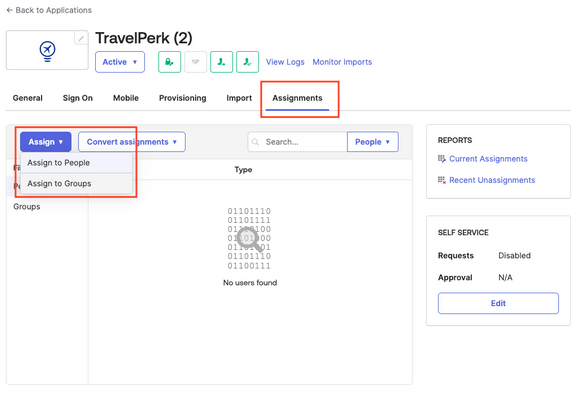
Select the Assignments tab, then select Assign.
-
Select Assign to People or Assign to Groups, depending on who you want to sync. For a first test, choose Assign to People and assign yourself. Once everything looks good, assign the groups that need access to Perk.
-
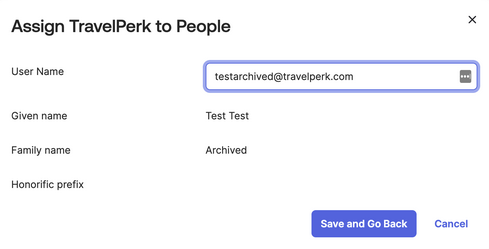
If you select Assign to People, set any default values in the dialog that appears. Perk uses these values only when the user's profile doesn't already have them, and all fields are optional. Select Save and Go Back.
TipFor your first test, assign a single person — for example, yourself — before assigning everyone.
Verify your integration
To confirm that provisioning works, check that your assigned users synced to Perk. You can do this in two ways:
- In Perk, go to Settings > Integrations > User provisioning > Manage and download the CSV log.
- In Perk, open the People page and confirm your users appear.
If the sync succeeds, you won't see any errors next to the user's name.
Troubleshooting
If a sync fails, Okta shows an error sign next to the user's name. Select it to see the details.

For error codes and the steps to fix them, see the SCIM troubleshooting guide.
Next steps
Updated 4 months ago